jQuary 적용하기
- 각 스킬들의 게이지 크기를 각각 적용 시키기 위해 Jquery를 사용하기로 했습니다.
- jQuary 를 설치하는 방법은 js파일을 다운로드하여 웹 디렉토리안에 저장하거나 CDN 방법이 있습니다.
- 저는 다운로드하여 디렉토리에 저장한 후 사용하기로 했습니다.
- jQuary는 아래의 링크를 통해 접속하면 받을 수 있습니다.
jQuery
What is jQuery? jQuery is a fast, small, and feature-rich JavaScript library. It makes things like HTML document traversal and manipulation, event handling, animation, and Ajax much simpler with an easy-to-use API that works across a multitude of browsers.
jquery.com
- 다운로드 받은 파일을 static > js 디렉토리안에 넣어 줍니다.
- <head> 태그 안에 아래의 명령어로 js 파일을 적용 시킵니다.
<script src='../static/js/jquery-3.5.1.min.js'></script>jQuary 적용 확인
- static > js 디렉토리에 common.js 파일을 생성해서 간단한 예제코드로 잘 적용 되었는지 확인해 보겠습니다.
- common.js를 index.html에 불러 옵니다.
{% extends 'layout.html' %}
{% block content %}
<script src='../static/js/common.js'></script>
<div id='maintext'>Welcome to My PortFolio</div>
<div id="mainsubtext">
    <p>Breath</p>
    <p>- Everything will be made by me.</p>
</div>
<div id='mainimg'>
    <img src="../static/img/main/main_img.jpg" alt="MainImage">
</div>
{% endblock %}
- common.js 파일 안에 아래의 명령어를 입력해 index페이지에 접속시 알림창이 나오도록 합니다.
$(document).ready(function(){
    alert("Hello World");
})
- index페이지에 접속 합니다.
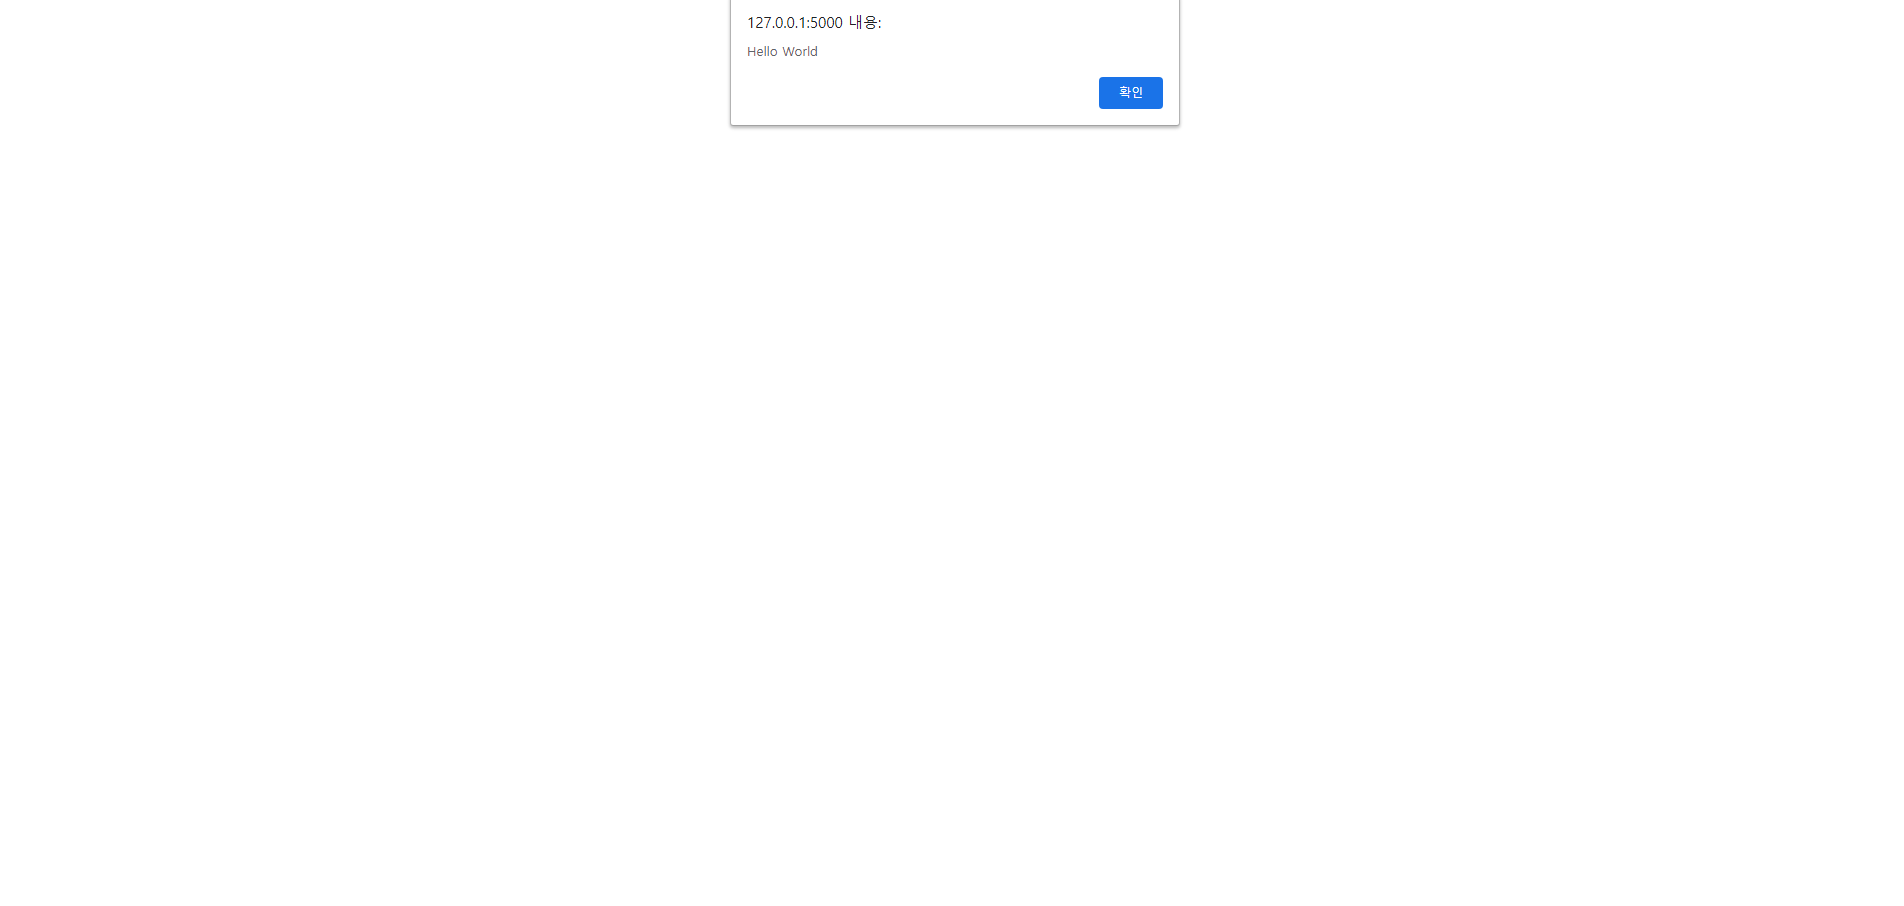
- 알림창이 나온 것 을 확인 할 수 있습니다.
- 이제 jQuary를 이용해서 프로그레스 바를 완성 시켜 보겠습니다.
프로그레스바 - 게이지 - jQuery 코드 작성
게이지 크기 지정
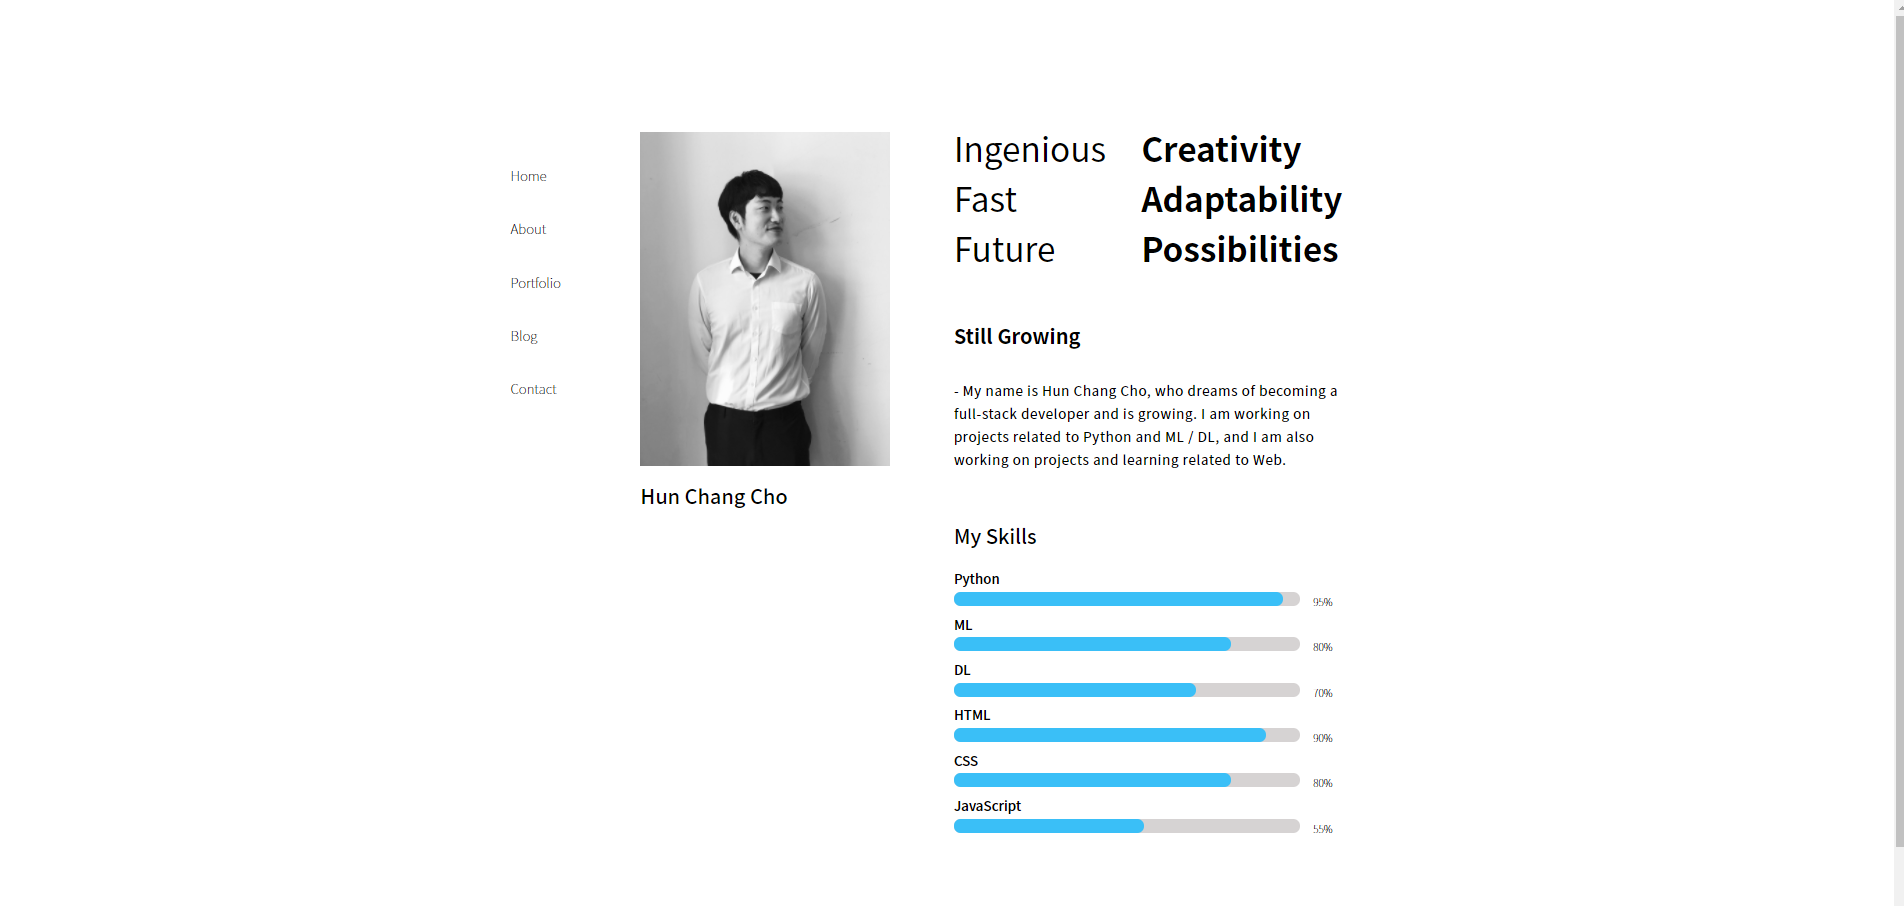
- 모든 스킬들의 프로그레스바 게이지들을 span태그로 만들어지고 class = "gauge" 로 정의 되어 있습니다.
- span.gauge 의 속성 per의 값은 게이지의 크기값을 가지고 있습니다.
<span class="gauge"  per="95">
</span>
- about.html 의 스킬들의 per값을 각각 지정해 줍니다.
- jQuery 선택자로 gauge 를 선택 합니다.
- 이때 모든 span.gauge에 css를 적용하기 위해서 each() 함수를 사용하고 이 안에 funtion(){} 을 사용합니다.
- 각각의 span.gauge를 선택 하기 위해서 $(this)를 사용합니다.
- $(this)로 선택된 태그의 속성 per의 값을 가져옵니다.
- 속성값을 변수에 저장하고 css()를 사용해서 width 값을 지정해줍니다.
$(document).ready(function () {
    $('.gauge').each(function () {
        var $this = $(this);
        var per = $this.attr('per');
        $this.css('width', per + "%");
    });
});
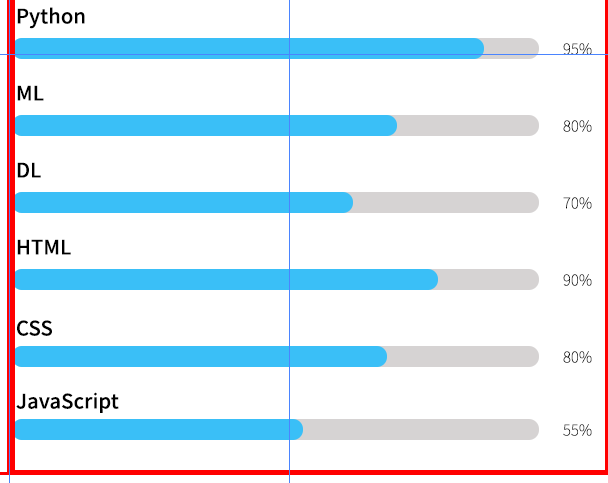
- 이제 확인해 보겠습니다.
- 각 속성값에 맞게 들어 크기가 변했습니다.
- 이제 animation / 애니메이션을 적용 시켜 보겠습니다.
jQuery 애니메이션(Animation) 적용
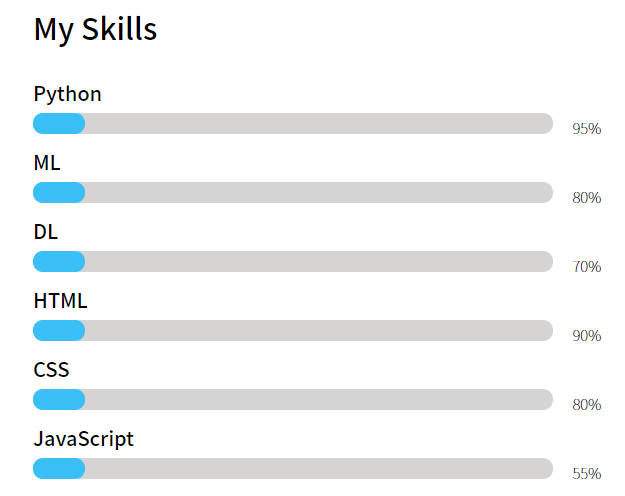
- about 페이지 접속시 게이지가 정해놓은 퍼센트 만큼 차츰 커지는 애니메이션을 적용시키려고 합니다.
- 먼저 게이지의 시작점을 잡아주기 위해 css 파일에 지정해놓은 span.gauge의 width 값을 10%로 변경합니다.
#myskills > .skill > .progressbar > .gauge {
    display: inline-block;
    width:10%;
    height: 21px;
    background-color: #3abff7;
    border-radius: 10px;
    transition: 1s linear;
}
- common.js 에서 css()부분을 삭제하고 animation()을 사용하겠습니다.
- $this를 사용하여 태그들을 선택하고 각 태그들의 per 속성값을 width값으로 지정해서 animation을 적용합니다.
$(document).ready(function () {
    $('.gauge').each(function () {
        var $this = $(this);
        var per = $this.attr('per');
        $this.animate({
            width: per + "%"
        });
    });
});
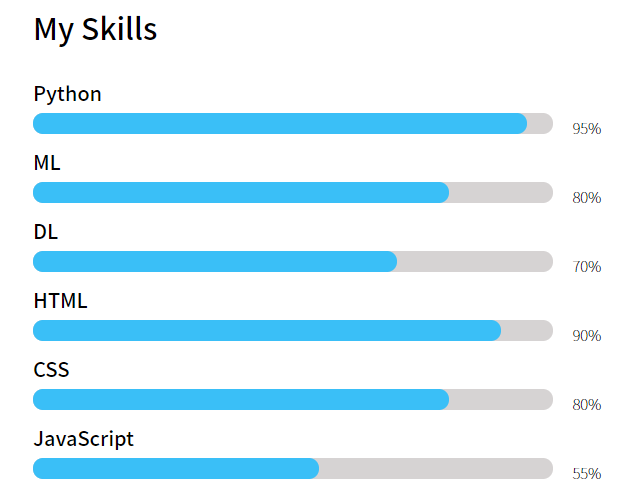
- 잘 적용 되었는지 확인해 보겠습니다.
- gif 파일이라 조금 끊겨 보이지만 웹에서는 잘 작동 하고 있습니다.
- about 페이지가 완겅 되었습니다.
- 다음포스팅부터 Portfolio 페이지를 진행해 보겠습니다.